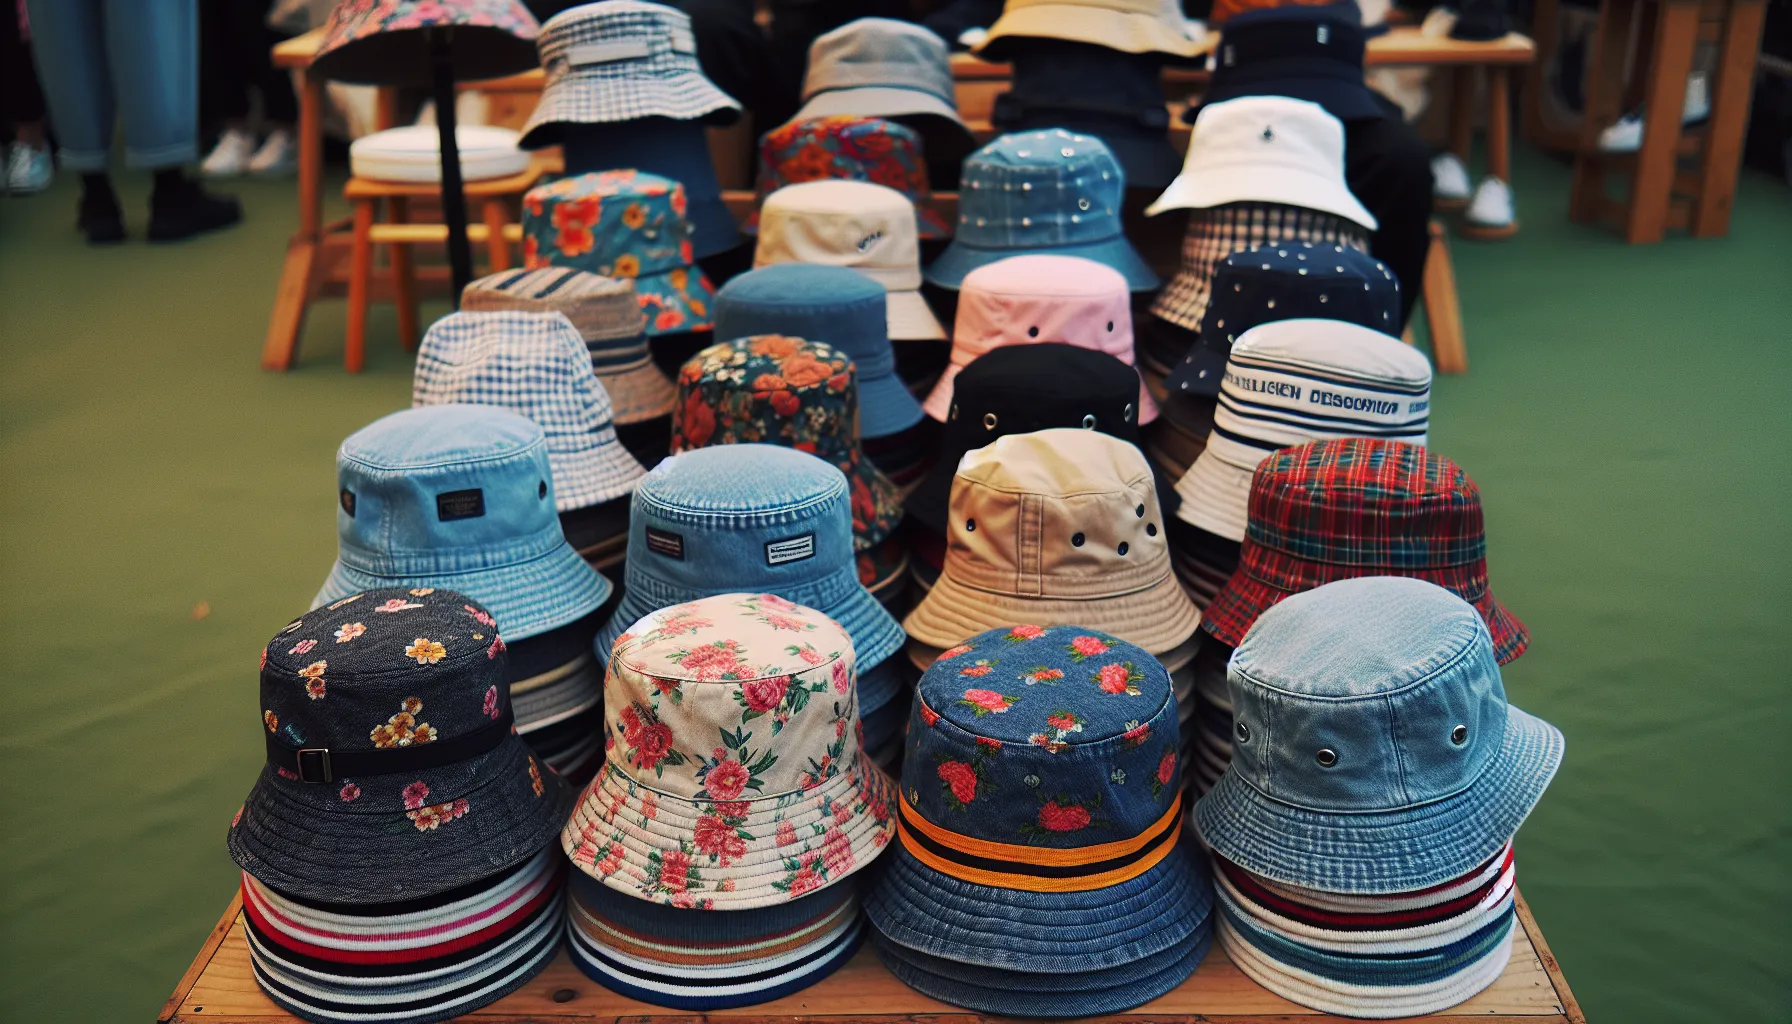
Bucket Hats: Discover the Latest Trendy Designs
Bucket Hats: Discover the Latest Trendy Designs Bucket hats have become increasingly popular in recent years as a trendy accessory. These stylish hats are not
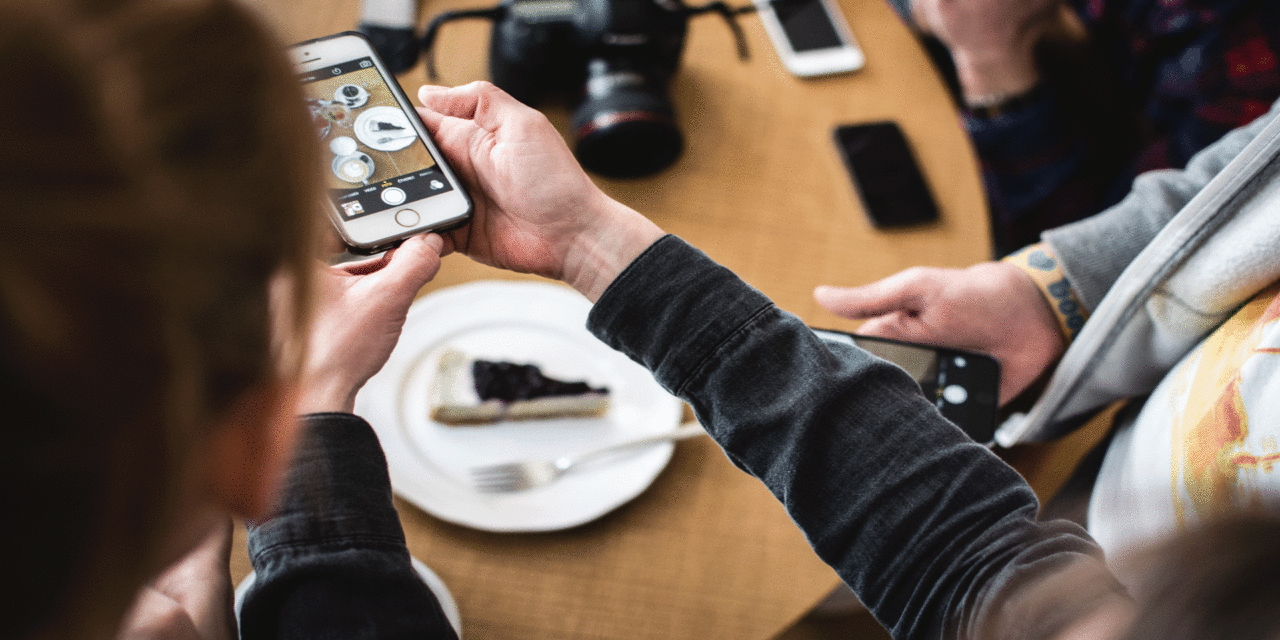
Food photography is everywhere, from the simple Instagram foodie posts to the stylish photos on food blogs. The best thing about it is how anyone can get in on the action — all you need is a camera and food. This guide will teach you how to photograph food that will create mouth-watering images.
 —")
Good composition and lighting are key to excelling in food photography.
Food photography can fall into three categories: Instagram, blogs, and professional.
Instagram is the best social media platform to show off your food images. Whether you’re a business, blogger, chef or foodie, you can use Instagram to show off your creations.
Food bloggers have become the master of food photography. They have their own style and have become experts at styling their creations. Generally, they post photos of their creations along with recipes.
Professional food photography generally deals with taking photos for advertising, marketing, packaging, or editorial.
Food photography is all about understanding how to make the food shine, and you can accomplish this with proper plating, lighting, composition, and editing.
Before you start snapping away at your dinner, first, you should know some photography basics that can make your photos pop. Get familiar with these three camera terms to increase your food photography techniques:
 —")
Aperture is the opening of the lens that controls the amount of light entering the camera. The higher the f-number on your camera, the smaller the aperture. The smaller the f-number, the bigger the aperture. Wider apertures let in more light, creating a brighter image. Narrower apertures result in darker photos. Apertures also control the depth of field, which is how blurry or clear the background is compared to your subject. A shallow depth of field (large aperture, ex., f/2) creates a blurry background, and a deep depth of field (small aperture, ex., f/16) creates a sharp background. A shallower depth of field tends to look better, and the object stands out more.
Shutter speed controls how much light reaches the lens, depending on how fast or slow the camera’s shutter opens and closes. A fast shutter speed means less light reaches the camera’s sensor. Shutter speed is usually used to capture movement. The faster your shutter speed (ex., 1/500 seconds), the more you’ll be able to photograph a moving subject. But a lower shutter speed will result in blurry images, which can be good or bad depending on what you’re trying to capture.
ISO is the sensitivity of the camera’s sensor to light and controls how much digital noise is in the photo. Digital noise looks like film grain. The higher the ISO, the more sensitive the sensor is, and the more grainy your photos will be. If you prefer a more gritty look to your food images, then a higher ISO is perfect.
Mastering these basics can bring you closer to good food photos.
It might be tempting to shoot all your food images on automatic mode. A good middle ground is to take photos using the semi-automatic modes of aperture priority, shutter priority, and program.
Aperture priority mode (Av or A one your camera) gives you control over aperture and ISO, but the camera controls the shutter speed. Shutter priority mode (Tv or S) lets you control the shutter speed and ISO while the camera adjusts the aperture. Program mode (P) gives you a little more control. When you adjust the ISO, the camera will change the aperture and shutter speed. However, you can also change these settings if you want a different aperture or shutter speed than the camera suggests.
If you don’t know how to frame a photograph, you’re not going to be able to achieve beautiful food photographs. A great composition is one of the keys to creative food photography.
Composition is the arrangement of various elements in a photo. For food photography, that means styling the photos with utensils, napkins, interesting backgrounds, and any other details. These items will add interest and draw the eye to the food.
One of the most well-known composition technique is the “Rule of Thirds.” This technique is when you imagine a 3×3 grid and position the food either at the intersection of the lines or along them. Some cameras, like the ones on smartphones, have a built-in grid.
There are other compositions and food photography tips and tricks that can create even more yummy food pictures.
 —")
Creating lines in your photos will draw the viewer’s eye to your main subject — delicious food. The lines can be straight, curved, horizontal, vertical, or diagonal. Lines can create a sense of depth and suggest a direction. You can achieve lines in your photo by strategically placing the elements to imply a line.
You can use props or ingredients to create layers and lines in your images to draw your viewer’s eyes to the delicious food. Shooting from above can highlight the lines you’ve created.
Forms are three-dimensional shapes that can either be organic or geometric. Space is the area between and around the objects. Shapes create positive space, while spaces around the shapes create negative space. When setting up your food photos, you should be aware of the positive and negative space. Make sure one is not dominating the other. For example, too much positive space can make the photo look too cluttered, and the subject may get lost. It’s best, even ideal, to have more negative space than positive as it will draw attention to the food even more.
 —")
Color adds interest to any photo and draws the eye to the subject. However, if you use too many colorful props or misuse them, it can distract from the food. Color can also impact mood as certain tones have a calming effect. In general, neutral tones, like a neutral background, are best to make the food pop.
Picking props that have similar tones as the food is key to beautiful food photography. This trick will create a link between the food and the background, resulting in balance and harmony. Overall, try to lean towards warm colors as those tones can increase appetite. Natural colors like greens or browns can add an organic feel to your photos as well.
Different textures add an exciting element to any food photo. The texture can be smooth, rough, soft or hard. Try to use props with a lot of texture, such as a wood cutting board. You can capture and highlight the texture to add depth to a photo.
 —")
Food photos can benefit from movement, both literal and compositional. Literal movement is showing physical movement, like someone pouring a glass of wine. Compositional movement is when a viewer’s eyes move between different elements in your image. You can achieve compositional movement by using color, shapes, lines or textures in your photo.
Balance is when the different objects in an image are combined harmoniously, meaning no element is overpowering another. Usually, the easiest way to tell if an image is unbalanced is if it feels like something missing or the photo feels off. This is different from asymmetry as an asymmetrical photo can still be balanced.
 —")
Pattern is when elements of a photo repeat. This repetition can be shapes or textures. Patterns add interest to an image and give our eyes something to follow. Patterns can be achieved by using similar shapes, and it’s mainly used as a supporting element to the main subject.
Now that you have a grasp of different composition techniques, you can apply them to your food photographs to make them visually appealing. Here are the different ways you can style your food images to create good pictures.
You can create a more dynamic and creative food image by decorating with small items, like a garnish. For example, if you’ve made a tasty cake, you can include some dry and wet ingredients you used, like flour and eggs. You can also decorate using kitchen supplies like cutlery or utensils.
You can also add food photography backdrops to add more interest to your photos. Simple wood or faux-painted boards and marble tiles are options you can use for your food photography background.
You can decorate your station however you want, but keep in mind that simple is better.
Sometimes, the surface you place your food on can impact the look and feel of your photo. For example, using a wooden surface such as a cutting board or a dining table will make your image look more rustic. A rustic aesthetic can complement comfort food like soup.
On the other hand, choosing a white surface, like a countertop, or white plates provides a cleaner look. White surfaces can give colorful foods that extra pop. A more minimalistic look can complement dessert food photography, especially if you’re highlighting a rainbow cake or pastel cupcakes.
 —")
You can create a more dynamic and creative food photograph by decorating it with small items like utensils.
When you’re arranging your food, try to start in the middle and work your way outwards. This method will ensure a more symmetrical plating. Also, make sure to think out each element’s position and arrange them neatly. Messy plating can ruin the look of the food and create an unflattering image.
Properly using negative space can change your image from amateur to professional food photography. When composing food images, make sure to leave breathing room around the subject. Adding more negative space creates an eye-catching photo and places more emphasis on the food. Negative space doesn’t always mean empty space. You can fill in the negative space with ingredients and props like sauces, tins, or jars.
 —")
A wood background can make a food photograph appear more rustic and natural-looking.
When you’re starting in food photography, you may not know your aesthetic yet. Try looking at other food photographers to get a sense of the types of styles out there. If you feel like one speaks to you more than another, try adding that style into your aesthetic.
The styles out there vary, from rustic, natural, minimalistic and modern. For example, a rustic style has more organic elements like wood.
Once you’ve found your style, stick with it, and make it consistent. If you want to focus on baking pictures, only take photos of baked products. If you’re more into black and white food photography, make sure all your photos are black and white. But if you prefer macro food photography, try to get that style in every shot. Consistency is essential if you’re posting your photos on Instagram. An account with a consistent style or theme is more visually appealing than one that’s all over the place.
Since you’re mainly taking still photographs, you don’t need a fancy camera. Ideally, the best camera to use for your food photos is a DSLR with a 50 mm prime lens. This lens is the best lens for food photography. A prime lens means it has a fixed lens that doesn’t zoom in and out. Instead, you’ll have to zoom in on your food by moving closer to it. Since you’re taking photos of still images, it won’t matter much, and zooming can result in low image quality. If you want beautiful food photographs, a prime lens is the best option.
But if you can’t afford a DSLR camera, your iPhone or Android can work just fine with the continually improving phone camera technology. When taking photos with your phone, make sure you’re applying the composition techniques. Here are other Android and iPhone photography tips:
Enabling Grid Mode on your phone will place a grid on your screen that you can use to apply the “Rule of Thirds.” Instead of imagining where the lines will be, you can see it right on your screen.
Your smartphone does an excellent job of automatically adjusting the brightness of your Android or iPhone pictures. But if you want a bit more control, you can manually adjust the exposure by tapping on the screen to refocus the camera. Once it’s refocused, a small sun icon will appear with a vertical scale. Swipe up and down this scale to adjust exposure.
If there’s one tip you take away from this guide, it’s to never zoom in on your subject. Zooming can make your food photos appear grainy or pixilated. Simply move closer to the subject instead.
To choose where you want to focus, tap on the screen the area you want to be in focus.
The Android or iPhone portrait mode is another great tool that can make your food photos shine. This mode is the same as setting your aperture to have a shallow depth of field. The result is having your subject be in focus while the background is a blur. Portrait mode will help you achieve a professional-looking food photo without a DSLR.
Other than a camera, you’ll need other different types of equipment if you want to create delicious food pictures.
Fixed lenses are the best options for food photography. They are generally smaller, cheaper, and faster than zoom lenses. They also have wider apertures, which means you have more control over your depth of field. Another good lens option is a macro lens with wide apertures, which lets you get close to your food. The result is a clearer image with a blurred background.
Reflectors/bounce cards help reflect, reduce, or diffuse light. This equipment can help you add more light in dark, shadowy areas. It can also add more light to your subject to distinguish it from the background.
Most of the time, you’ll be holding the camera when taking close up shots of your food. But a good quality tripod is nice to have to prevent blurry images.
One of the secrets to creating the best food images is lighting. If you have the fanciest camera and know all the composition techniques but have bad lighting, your photos won’t be good.
 —")
Natural lighting can make the food in your food images pop and stand out.
Try to shoot in natural lighting as much as possible, and avoid using overhead lights or flash. Artificial lights can cause a yellow cast on your photos, distorting the image. You want your photos to show the food accurately.
One of the things to watch out for is the intensity of the light source. A bright, sunny day can cause overexposure and cast harsh shadows. If you’re photographing food on a white plate on a light-colored background, intense direct light will wash out your photo.
A way to minimize harsh light is to place a diffuser between the window and your subject. This diffuser can be a thin, white bedsheet or a curtain that helps soften dark shadows and bright highlights caused by direct sunlight. You can also use dark bounce cards to add more shadows in the brightest areas of your photo.
Another tip is to move around to find the best light source. Sometimes the kitchen may be too bright, so you can move to a bedroom or living area with less direct sunlight. Even taking photos outside may be the best option when it’s an overcast day as the clouds act as a diffuser.
Side lighting, when the light comes from behind and to the side, makes most photos look good. It can help bring out the shadows and bright areas of food textures.
For food, the most flattering light is a soft backlight coming from a window that casts light above and behind the food. Backlighting helps catch the shine on liquids or enhance textures of food.
However, always avoid lighting from the front as it can create harsh, bright spots in your photos. It can also cause a loss of details and textures in your food.
 —")
Any food with layers, such as a burger, looks the best taken from a side angle.
The key to food photography is figuring out which angles are the most flattering to a specific food type. For example, pizza looks better from a birds-eye view where you can see all the toppings. A juicy burger or delicious cake looks best from the side as you can see the layers. The only way to tell which angle is best is by experimenting. Try taking photos at different angles and choose the one you think looks the best.
Many food images are shot from above because you can better show off the plating, background details and composition. A good in-between is a 45-degree diagonal angle where you can include your food’s top and side view.
If you’re using a DSLR, make sure to shoot in RAW format. Photos shot in RAW results in softer, more natural images. This format can also take a lot of heavy editing and won’t lose as much quality as shooting in JPEG.
The best editing software that can help create good food pictures are Adobe Lightroom and Photoshop. Lightroom and Photoshop can process RAW images and let you do basic editing such as exposure and vibrancy. They can also go into more advanced editing, such as fixing white balance or sharpening the image.
However, simple editing apps like Snapseed and VSCO are great options, especially if you’re using smartphones. These apps can perform basic editing but also have built-in filter presets.
But try to stray away from doing too much editing and using filters that can alter your food photos’ look. Ideally, you want to edit to make your images pop while keeping the original colors.
You can use many household items if you don’t want to spend a lot of money.
You can use nonstick cooking spray or a spray bottle to add shine to food to catch the light better. Household curtains can also act as diffusers to soften the natural light.
A hand mirror, white printed paper, or foam boards are perfect alternatives to bounce light on an area you want to highlight. A black foam board or blackboard can add deeper shadows to create a darker, moody image. You can buy all of these items at a craft store.
Food photography doesn’t have to be intimidating. If you want more hands-on help, you can take a food photography course online. But whether food photography is only a hobby or more of a career, the tips on this blog can be applied anywhere.
Do you like pictures of food? Check out some of our favorite winter dinner ideas here!
Bucket Hats: Discover the Latest Trendy Designs Bucket hats have become increasingly popular in recent years as a trendy accessory. These stylish hats are not
The ultimate guide to rocking the trendy bucket hat styles. Elevate your fashion game with versatile and stylish bucket hats. Click here for fashion inspiration and tips!
Discover the best places to buy bandanas and find your unique bandana style. Explore the wide range of designs and styles available at Wholesaleforeveryone.com and get free shipping on orders over $35
Discover how to create a stylish and versatile wardrobe with tops. Elevate your outfits and transform your style with the right tops. Click here to learn more.
Discover expert tips for caring and maintaining your tops to build a versatile wardrobe. Extend their lifespan, retain shape and color, and save money with proper care. Click now for a wardrobe that truly represents you
Fashion events for tops, including t-shirts, shirts, hoodies, and jackets, showcase the latest trends and styles. Stay updated with industry developments and explore Wholesaleforeveryone.com’s collection for quality